こんにちは、Androidエンジニアの@morux2です。スタディサプリ小学講座には、子どもがお絵描きツールで保護者とコミュニケーションを取れる「きょうもできた!」機能があります。本記事では、この機能の実装詳細をご紹介できればと思います。


完成形
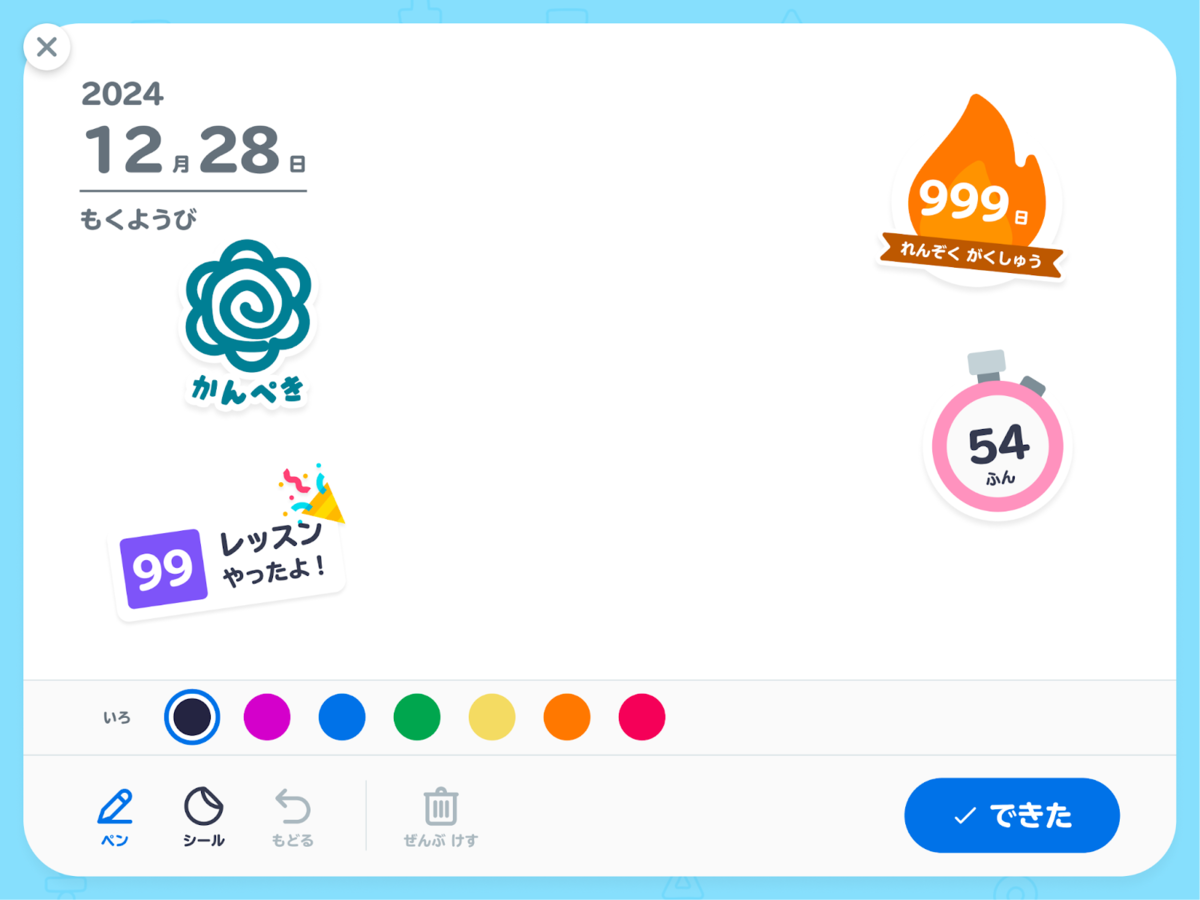
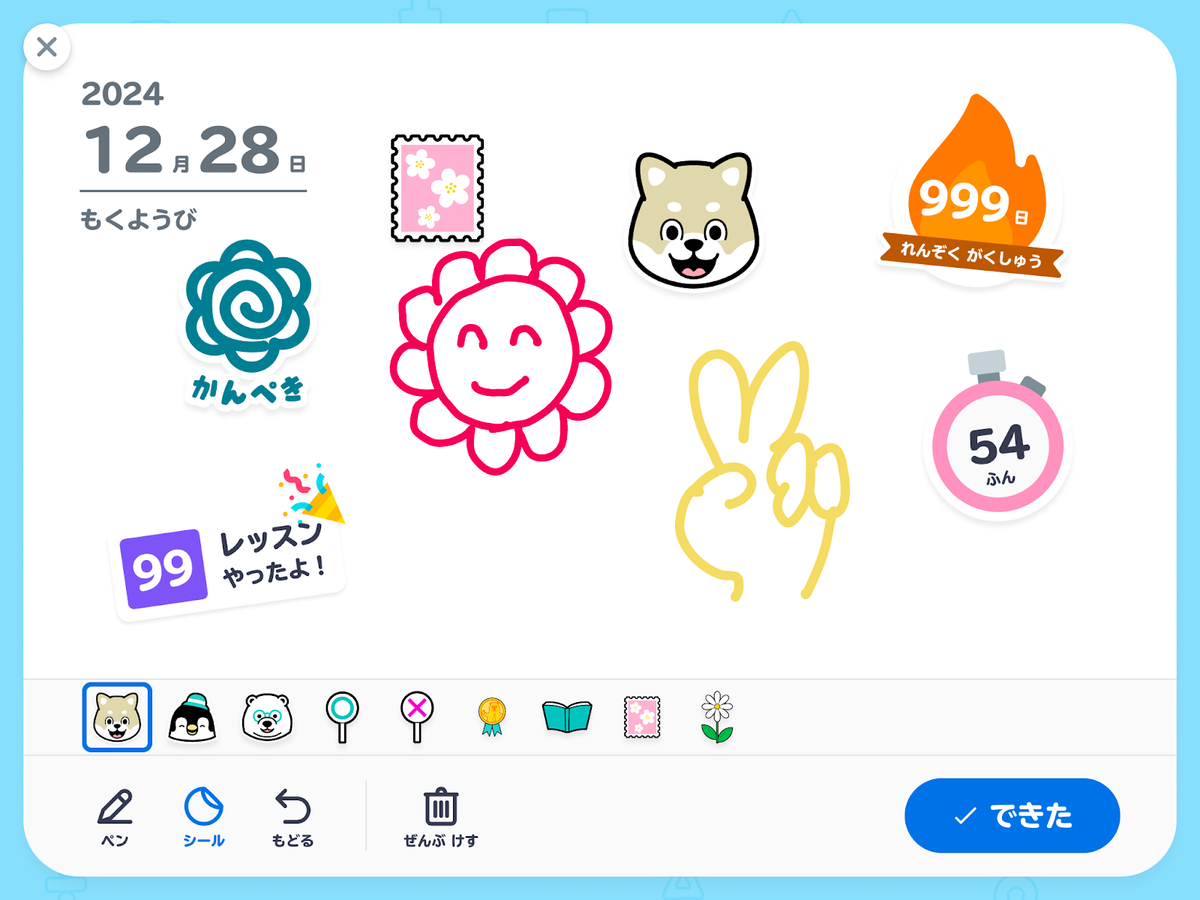
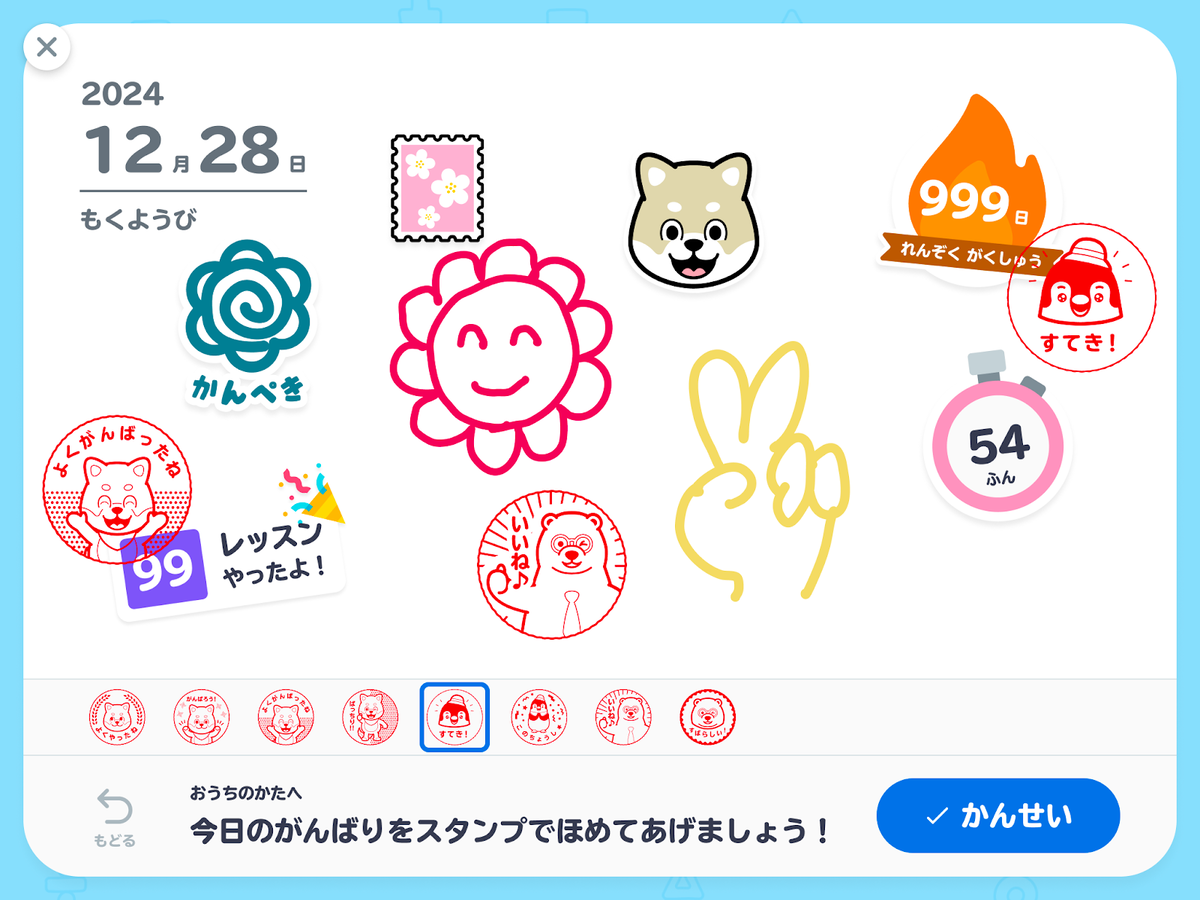
「きょうもできた!」機能では、1日の学習のサマリ表示の上に、ペンとスタンプを使ってお絵描きをすることができます。
ペン : 色と太さを選択し、フリーハンドで絵を描くことができる
スタンプ : 選択したスタンプを、タップで配置することができる
また、次のような操作ができます。
ペンとスタンプの操作を切り替える
1つ戻る
全部消す


データ構造
お絵描きした内容を Decoration というカスタム sealed interface の mutableStateList で保持します。ペンとスタンプの data class は Decoration インターフェースを実装します。
sealed interface Decoration {
    data class Pen(
        val path: Path, // なぞった軌跡 (1筆)
        val color: Color, // ペンの色
        val strokeWidth: Dp, // ペンの太さ
    ) : Decoration

    data class Stamp(
        val imageBitmap: ImageBitmap, // スタンプの画像
        val offset: Offset, // スタンプの配置位置
    ) : Decoration
}
画面回転等でお絵描きの内容が揮発しないように、Decoration の mutableStateList は ViewModel で保持し、ViewModel からリストの操作を行います。View から直接リストを操作することがないように、View には immutable な List 型で公開します。
ViewModel ではなく独自の Savar を実装することも検討しましたが、サイズが大きくなる可能性のあるオブジェクトを Bundle に保持することがクラッシュのリスクにつながると判断し、ViewModel に配置する形にしました。(参考)
private val _decorations = mutableStateListOf<Decoration>()
val decorations: List<Decoration> = _decorations

fun addDecoration(decoration: Decoration) { // 要素を追加する
    _decorations.add(decoration)
}

fun onUndoClicked() { // 1つ戻る
    _decorations.removeLastOrNull()
}

fun onClearClicked() { // 全部消す
    _decorations.clear()
}
ちなみに、削除した要素を保管するリストを定義すれば、1つ進む操作も実現できます。
val _undoDecorations = mutableStateListOf<Decoration>()

fun onUndoClicked() {
    val undoDecoration = _decorations.lastOrNull()
    _decorations.removeLastOrNull()
    if (undoDecoration != null) _undoDecorations.add(undoDecoration)
}

fun onRedoClicked() {
    val redoDecoration = _undoDecorations.lastOrNull()
    _undoDecorations.removeLastOrNull()
    if (redoDecoration != null) _decorations.add(redoDecoration)
}
お絵描きした内容を描画する
View では Decoration のリストの内容を Canvas に描画します。ペンの描画には drawPath() を用い、画像の描画には drawImage() を用います。drawImage() では topLeft の座標を渡すことになるので、タップした位置がスタンプの中心になるように、スタンプの幅と高さを用いて座標を計算しています。
@Composable
private fun DrawingCanvas(
    decorations: List<Decoration>,
) {
    Canvas(
        modifier = Modifier.fillMaxSize()
    ) {
        decorations.forEach {
            when (it) {
                is Decoration.Pen -> {
                    drawPath(
                        path = it.path,
                        color = it.color,
                        style = Stroke(width = it.strokeWidth.toPx())
                    )
                }
                is Decoration.Stamp -> drawImage(
                    image = it.imageBitmap,
                    topLeft = it.offset - Offset(it.imageBitmap.width / 2f, it.imageBitmap.height / 2f) // タップした位置がスタンプの中心になるように配置する
                )
            }
        }
    }
}
ペンで絵を描けるようにする
次に、ペンで絵を描けるようにしていきます。なぞった軌跡の記録には PointerInputScope.detectDragGestures を用います。現在の軌跡を currentPath として記録し、onDragEnd のタイミングで Decoration のリストに追加します。
ドラッグ中にも currentPath が描画されるように drawPath() を呼び出します。drawPath() は一番最後に呼び出すことで、今まで書いた絵の上に currentPath を重ねます。 onDrag のたびに currentPath のインスタンスを再生成することで、recomposition が反応するようにしています。
また、Modifier.pointerInput(key1: Any?, block: PointerInputEventHandler) の key にペンの色や太さを指定することで、値が変わった時にブロックが再生成されるようにします。key を指定しないとペンの色や太さの変更が反映されないので注意が必要です。(参考)
@Composable
private fun DrawingCanvas(
    decorations: List<Decoration>,
    penColor: Color,
    penStrokeWidth: Dp,
    addDecoration: (Decoration) -> Unit,
) {
    var currentPath by remember { mutableStateOf(Path()) }

    Canvas(
        modifier = Modifier
            .fillMaxSize()
            .pointerInput( // ペンの色や太さが変わった時はブロックを再生成し、変更が反映されるようにする
                penColor,
                penStrokeWidth
            ) {
                detectDragGestures(
                    onDragStart = { offset ->
                        // 始点
                        currentPath.moveTo(offset.x, offset.y)
                    },
                    onDragEnd = {
                        addDecoration(
                            Decoration.Pen(
                                path = currentPath,
                                color = penColor,
                                strokeWidth = penStrokeWidth
                            )
                        )
                        currentPath = Path() // 空の currentPath を作成
                    },
                    onDragCancel = {
                        currentPath.reset()
                    },
                    onDrag = { change, _ ->
                        // 新しいインスタンスを作成しないと、currentPath が recomposition されないので注意
                        currentPath = Path().apply {
                            addPath(currentPath)
                            // drag した分だけ線を引く
                            lineTo(change.position.x, change.position.y)
                        }
                    }
                )
            }
    ) {
        decorations.forEach {
            // 省略
        }
        // Decoration のリストに追加されるまでの間の軌跡を描画する
        drawPath(
            path = currentPath,
            color = penColor,
            style = Stroke(width = penStrokeWidth.toPx())
        )
    }
}
スタンプを押せるようにする
次に、スタンプを押せるようにします。スタンプを押した座標は PointerInputScope.detectTapGestures で取得します。onPress のタイミングで座標とスタンプの画像を Decoration のリストに追加します。pointerInput() の key には選択されたスタンプを指定します。
@Composable
private fun DrawingCanvas(
    decorations: List<Decoration>,
    penColor: Color,
    penStrokeWidth: Dp,
    @DrawableRes stampDrawableRes: Int,
    addDecoration: (Decoration) -> Unit,
) {
    var currentPath by remember { mutableStateOf(Path()) }
    val stamp = ImageBitmap.imageResource(stampDrawableRes)

    Canvas(
        modifier = Modifier
            .fillMaxSize()
            .pointerInput(
                penColor,
                penStrokeWidth
            ) {
                detectDragGestures(
                    // 省略
                )
            }
            .pointerInput( // 選択されたスタンプが変わった時はブロックを再生成し、変更が反映されるようにする
                stampDrawableRes
            ) {
                detectTapGestures(
                    onPress = { offset ->
                        addDecoration(
                            Decoration.Stamp(
                                imageBitmap = stamp,
                                offset = offset
                            )
                        )
                    }
                )
            }
    ) {
        // 省略
    }
}
ペンとスタンプを切り替えられるようにする
このままの実装だと、ペンとスタンプの両者の操作が同時に反応してしまいます。そこで、現在ペンとスタンプどちらを利用しているかを enum で表現し、ペンとスタンプの選択状態に合わせて反応する pointerInput() を切り替えるような処理を追加します。ここでも、pointerInput() の key にペンとスタンプの選択状態を設定する必要があるので注意が必要です。
enum class InputMode {
    Pen,
    Stamp
}
@Composable
private fun DrawingCanvas(
    decorations: List<Decoration>,
    inputMode: InputMode,
    penColor: Color,
    penStrokeWidth: Dp,
    @DrawableRes stampDrawableRes: Int,
    addDecoration: (Decoration) -> Unit,
) {
    var currentPath by remember { mutableStateOf(Path()) }
    val stamp = ImageBitmap.imageResource(stampDrawableRes)

    Canvas(
        modifier = Modifier
            .fillMaxSize()
            .pointerInput( // ペンとスタンプの選択状態が変わった時にブロックを再生成する
                inputMode,
                penColor,
                penStrokeWidth,
            ) {
                if (inputMode != InputMode.Pen) return@pointerInput
                detectDragGestures(
                    // 省略
                )
            }
            .pointerInput( // ペンとスタンプの選択状態が変わった時にブロックを再生成する
                inputMode,
                stampDrawableRes,
            ) {
                if (inputMode != InputMode.Stamp) return@pointerInput
                detectTapGestures(
                    //省略
                )
            }
    ) {
        // 省略
    }
}
最終形
最終形のコードはこちら
@Composable
private fun DrawingCanvas(
    decorations: List<Decoration>,
    inputMode: InputMode,
    penColor: Color,
    penStrokeWidth: Dp,
    @DrawableRes stampDrawableRes: Int,
    addDecoration: (Decoration) -> Unit,
) {
    var currentPath by remember { mutableStateOf(Path()) }
    val stamp = ImageBitmap.imageResource(stampDrawableRes)

    Canvas(
        modifier = Modifier
            .fillMaxSize()
            .pointerInput(
                inputMode,
                penColor,
                penStrokeWidth,
            ) {
                if (inputMode != InputMode.Pen) return@pointerInput
                detectDragGestures(
                    onDragStart = { offset ->
                        currentPath.moveTo(offset.x, offset.y)
                    },
                    onDragEnd = {
                        addDecoration(
                            Decoration.Pen(
                                path = currentPath,
                                color = penColor,
                                strokeWidth = penStrokeWidth
                            )
                        )
                        currentPath = Path()
                    },
                    onDragCancel = {
                        currentPath.reset()
                    },
                    onDrag = { change, _ ->
                        currentPath = Path().apply {
                            addPath(currentPath)
                            lineTo(change.position.x, change.position.y)
                        }
                    }
                )
            }
            .pointerInput(
                inputMode,
                stampDrawableRes,
            ) {
                if (inputMode != InputMode.Stamp) return@pointerInput
                detectTapGestures(
                    onPress = { offset ->
                        addDecoration(
                            Decoration.Stamp(
                                imageBitmap = stamp,
                                offset = offset
                            )
                        )
                    }
                )
            }
    ) {
        decorations.forEach {
            when (it) {
                is Decoration.Pen -> {
                    drawPath(
                        path = it.path,
                        color = it.color,
                        style = Stroke(width = it.strokeWidth.toPx())
                    )
                }
                is Decoration.Stamp -> drawImage(
                    image = it.imageBitmap,
                    topLeft = it.offset - Offset(it.imageBitmap.width / 2f, it.imageBitmap.height / 2f)
                )
            }
        }
        drawPath(
            path = currentPath,
            color = penColor,
            style = Stroke(width = penStrokeWidth.toPx())
        )
    }
}
参考記事
今回の実装には下記の資料およびライブラリを参考にさせていただきました。
DroidKaigi2022 Jetpack Composeを用いて、Canvasを直接触るようなコンポーネントを作成する方法 - Speaker Deck
さいごに
いかがでしたでしょうか? Canvas と pointerInput メソッドを用いることで、Jetpack Compose で手軽にお絵描き機能を実現できると伝わったかと思います。
実は「きょうもできた!」機能は、@morux2 がエンジニアとして企画立案から主導させていただきました。機能がリリースされるまでのプロセスや開発の経緯を RECRUIT TECH CONFERENCE 2025 にて「エンジニア主導の企画立案を可能にする組織とは?」というタイトルで発表する予定です。ご興味のある方はぜひ参加登録をよろしくお願いします!